Friday 29 June 2012

Summer project #3: Delish felt food

As part of the marathon to make all the two-year olds' birthday presents in Little Monkey's circle, I decided to create something special for a special little friend of her.
For Meli who, in spite of her young age, loves to help her mummy in the kitchen (her specialities: rolling croissant dough into shape and stirring cookie mixture), I thought I'd try to make some felt food for her to do some creative pretend play...I've also made a little apron to go with it (what proper chef doesn't have her own apron?!), which I'll write very soon about.


The inspiration came from some fabric food that Ikea now sells, which I have to admit, it's pretty sweet...but can you compare with the abundant love that comes free with hand-made felt food???

IKEA DUKTIG food
I had made felt food before for Little Monkey's playhouse. However, I was looking for a more sophisticated and realistic look.
So, again on my invaluable Pinterest, and off I went hunting for felt food.
Little I know there is a whole culinary world made of felt: from chickens to cakes, from crisps to veggies, from cupcakes to sophisticated breads (admittedly, croissants and novelty bread could all be found in a French blog...as you would expect!)
But I wanted to concentrate on fruit and veg, also for the educational value of teaching young children that green is good...these are the tutorials I found:


Strawberries
 Bread and Buttons. Excellent tutorial, really easy and perfect results.


Corn
While Wearing Heels' tutorial. When I saw it, I totally felt in love with this felt corn, so I didn't hesitate to use it for my creation. However, I modified slightly the procedure in an attempt to simplify it a little, by rolling a piece of white felt rather than sewing two halves of the cob and stuffing it, as you can see in the pic below.

I then hand-stiched my rows of kernels straight onto this "roll"; by the way, the kernels are very realistic and look great but take AGES to make, also because the whole lot is entirely hand stitched...I'm very happy of the result, although the original tutorial with the stuffed cob seems to give a slightly less wobbly corn... Check this blogger's other felt creations, they are really great.


Apple
Felt Cuisine pattern and tutorial. Before using this pattern I tried to make my own basic apple section...I didn't know it is in fact a fine art to come up with the perfect section to make an apple! My first attempt turned out an ugly tomato...this one is awesome.

Courgette
Une Ame d'Enfant (blog in French - check her other incredible creations, even just for curiosity, including the above mentioned bread and patisserie). My rusty French just about helped me to understand the written content of this sweet blog, but the good thing of the courgette tutorial is that the pictures are very self-explanatory.


Aubergine / Egg plant
This one is my own creation, on the basis of the courgette tutorial and pictures of aubergines available on the internet. I wanted an aubergine to add a note of purple.


Carrots
Again, my own creation. These are extremely easy to make, each carrot is simply made out of one very long and narrow triangle, which is closed by sewing together the long sides, turned inside out then stuffed from the open top, closed and finished with a little irregular circle of green, hand-stiched to cover the closure of the carrot; finally, add a few hand stiches all around to create the little marks on the carrot's surface.

That's it! I didn't want to stop making felt food, if I had more time I would have loved to add bread and a cupcake and perhaps the chicken I pinned, but where to stop? That's the question!
You can find very good lists of tutorials of other felt food items on: 
Apartment Therapy
Skip to My Lou
Crafster's forum.

Hope you've got inspired to make some felt food! And don't forget to show me your creations, perhaps on my Facebook page?
Wednesday 20 June 2012

Bunting bunting bunting! Just another tutorial...

Bunting, or the festive decoration made of little triangular (or rectangular) flags, is something in Italy we only see in movies (American and English movies, that is). But maybe because bunting is something that doesn't belong to my culture, or my memories of past festive celebrations, I find it incredibly sweet and really effective in decorating and lightening up a room immediately.
Bunting in red, blue and white has literally invaded the streets of Britain in the last month because of the Queen's Diamond Jubilee, and I thought this was the right time to make some for my Little Monkey's birthday.

So, although you can find tons of tutorials for bunting on the Internet, I thought I'd share anyway a few tips for making a perfect (for me at least!) bunting. That's because it's all a matter of proportion, and I think I found the right one.

You'll need:
  • large scraps of fabric - fat quarters are perfect
  • bias tape (bought or homemade)
  • matching thread
  • card (for the template)
 If you want bunting flags that measure approximately 16cm in length, you'll need to make a template in card by cutting a square with sides 18cm long. Fold the square in half and cut the diagonal between the centre and the corner of your square as illustrated below. Repeat on the other side.


Use the template (which includes a seam allowance of 1/2 cm) to cut your fabric, two triangles per flag (I used 5 different types of fabric, all of them having some purple / violet in them, in check, stripe, polka and flower patterns), for as many flags as you need. In order to save time and fabric, you can cut the fabric as illustrated below, and if you have a rotary cutter, good for you! you'll save LOTS of time and will end up with a good, neat result - I didn't have one, and it meant just a little more time.


In order to calculate how many flags you need, follow the simple scheme below (for 680 cm of bias tape I made 25 flags, alternating the five patterns five times in the same order).


Once you have cut all your triangles, sew them in pairs, wrong sides facing, on the two diagonal sides only with a seam allowance of 1/2 cm, leaving the top open.


Before turning them inside out, remember to trim a little the tip of the triangle for a neater pointy finish.


Turn your flags inside out, and press them. In order to have a perfect triangle and to prevent the fabric from twisting, you can insert the card template inside the flag and iron on it


Before you start sewing the flags to the bias tape, I also suggest you fold the bias tape lengthwise in half  and press it, as this will prevent it from twisting while you are sewing.

Now you can insert your flags at the right intervals in the folded bias tape and sew them to it.


Well done! 
You finished your bunting! Now go, hang it to your wall and admire  the product of your love!


A very happy birthday: how to entertain a bunch of two year olds and mantain your sanity

After much preparation, finally the day of the second birthday party of Little Miss has arrived!
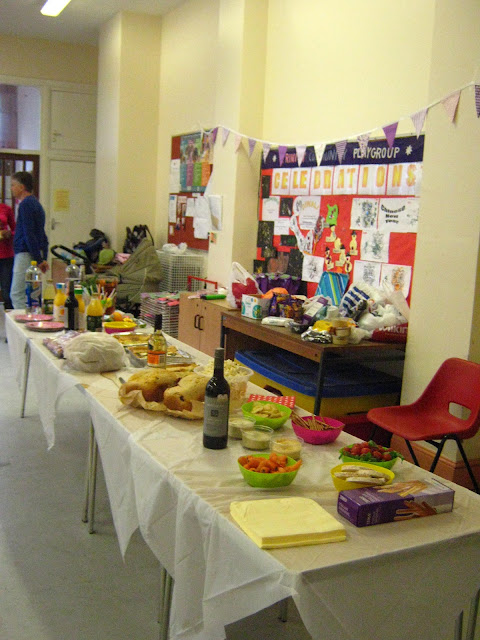
Last Saturday what was meant to be a typical English-style picnic in the park (in keep with the Queen's Diamond Jubilee celebrations just over) became a party in a church hall (thank you very much, English weather!)...without losing heart, we just moved party food and balloons and had lots of fun anyway!
So, a few ingredients for the perfect party (consider also we were celebrating two birthday parties at once, our little one's and her friend Alex who was born on the same day, so we definitely joined forces here):

1. Good food: I made two loaves of olive and sun dried tomato bread, one the night before, one on the morning of the party (don't think I was up at three in the morning to kneed by hand and bake, my wonderful bread machine did the donkey work!); we bought a platter of mixed antipasti to go with it;
I made three kinds of quiches, easy enough when you buy ready-to-roll shortcrust pastry, which you only need to fill with a mixture of roasted or pan-fried veg (I used mushrooms, asparagus and broccoli), egg, cheese, nutmeg and a bit of seasoning/herbs; for the non-veggies, add some chopped sausages or beacon, put it in the oven and you are done;
add the usual crisps, popcorn etc. and, for the little ones, rice cakes, breadsticks, cherry tomatoes, mini-carrots and dips, and pineapple / melon (which I forgot at home this time!);


2. Drinks: the obvious fruit juices and lemonade, but my favourite summer party drink is Pimm's and Lemonade (for the grown ups, of course!) with lots of strawberries, some orange and mint...don't forget a few beers for the boys.

3. Bunting: I made 7m of purple-shaded bunting (my first attempt, of which I am incredibly proud of...I can see how it can get addictive!). Bunting is easy enough to figure out even without templates or patterns, but there is a perfect ratio for me, and you can find here my tips and tutorial on bunting-making.


4. Crafting with kids: I could see for the first time my Little Miss realising it was her birthday, enjoying the party, the presents, the singing, etc. which meant, unlike last year, we mums couldn't simply sit around the table chatting. I organised a mini-workshop to entertain the kids (which worked like a dream with the slightly older ones too): I cut beforehand stripes of coloured card, bought a bunch of foam stickers, glue, rubber ink stamps, crayons (all quite affordable from Wilkinson, but you can find tons of these on the Internet) and let the kids decorate their own party crown! At the end of the decoration stage, we closed the crowns with sticky tape.


5. Some toys are necessary, especially for the littler ones, so my friend brought some plastic toy food, a riding horse and some toy cars to keep them entertained, as well as balls and balloons;


6. Music, of course! I'm lucky, because wonderful husband is a singer/songwriter in his leisure time, so we had a medley of nursery rhymes and Guns 'n' Roses (!), as well as some original tunes of his own making;


7. Cake: I made a Hello Kitty cake, which proved to be pretty easy to make starting from a round cake. The first time I made it (to take to nursery on her actual birthday), I used the Sugar Free Banana cake recipe I blogged about sometime ago; Little Monkey has obviously pasted the healthy food phase and didn't want it (to my disappointment, as it was a really delicious cake!), so the second time round I made a chocolate cake with whipped cream and strawberry filling...in both cases I baked the sponge the day before and decorated it with white icing sugar (ready to roll, remember my troubles when I decided to make it at home???), and a few details in writing liquid sugar, both widely available at cake shops and supermarkets.


8. Party bags: I know, not everyone gives party bags, especially when the kids are so small, but this is a lovely anglo-saxon habit that we don't have in Italy, which I think really makes people remember the party afterwards, so I decided to go for it. I visited the Crafty Crow blog and found inspiration for 40 different homemade party favours. I ended up making purple playdough with glitter, and added a few items like mini-books, peg dolls and stickers to the bags. I also used purple paper bags (which I bought on Amazon), as opposed to plastic, to make them more environmentally friendly.

That's it! Perhaps next year there will be more organised party games and maybe a magician, but for this year this was the perfect formula...and boy, I was tired at the end!!!
But all worth it looking at Little Monkey's face before blowing her candles!


Sunday 17 June 2012

Happy Father's Day! Card and present for under a fiver


I know it's a bit late for Father's Day suggestions, but perhaps you can pin these ideas for next year, or use them for some other family celebration.

Among the hundreds (not quite so many in reality, but it feels like it!) of things handmade by me in the last few weeks, I remembered Father's Day was coming up, on Pinterest I came across this cute card by A Day in My Life, and decided this was perfect for the occasion.
This is my version, made by drawing the profile of Little Monkey's hand on the cardboard from a Marks and Spencer's cake box, cutting out the hand shape twice and decorating it with a simple hand-written message ("I love you daddy...this much!" in Italian); my little one decorated it in her own way inside:

 
I think it will be super-cute when, in many years time, my husband looks at these little hands and thinks of how small our Little Monkey was...

I also made a cheap and cheerful present for him, which will remind him of the nice days he and Little Monkey spent together when she was this little: DIY Fridge Magnets.


a couple of drawings of Little Monkey which are now fridge magnets!

"Bee"

This is how I did it:

1. First I chose some nice pictures of the two of them together, some of her, and some pictures of her drawings;

2. Then I re-sized the pictures and arranged them snugly on a A4-size page using Photoshop - but you could use Word or PowerPoint;

3. I printed them out on normal A4 paper;

4. I laminated them (I admit, I used the work's laminator for this...); you don't have to do this, as you could print them directly on magnetic photo paper, but I did it because this way they are water-proof, which comes handy since the fridge where they will be stuck on is just next to the kitchen sink!

5. I glued them on magnetic photo paper (£1 for two sheets at the Pound Shop);

6. Finally, I cut the pictures out with ordinary scissors and...ta-dah! Fridge magnets for daddy at a very affordable price!

Happy Father's day everyone!